Recommendations for use of Angle Wall Bracing
- Position Wall Bracing as specified by frame drawings or code requirement.
- Mark saw cut position using Wall Bracing edge as guide, making sure that the angle between top plate and Wall Bracing is approximately 45°, but no less than 30° or greater than 60°.
- Cut the marked studs and plates to a depth of 18mm (no deeper than 20mm).
- Place unpunched leg of Wall Bracing into saw cut, with punched leg facing towards bottom plate.
- Trim Wall Bracing to required length.
- Fix Wall Bracing to each stud and each plate using two (2) 30 x 2.8mm Multinail galvanised reinforced head nails.
- Finally, affix the T-Plate, Stud Tie or Nail On Stud Tie as required (refer individual Multinail Product Brochures).
Please use relevant Standards to determine number, location and tie down of bracing units. Bracing capacities stated are relevant for wall heights up to, and including, 2.7m. For wall heights greater then 2.7m, refer to AS1684.
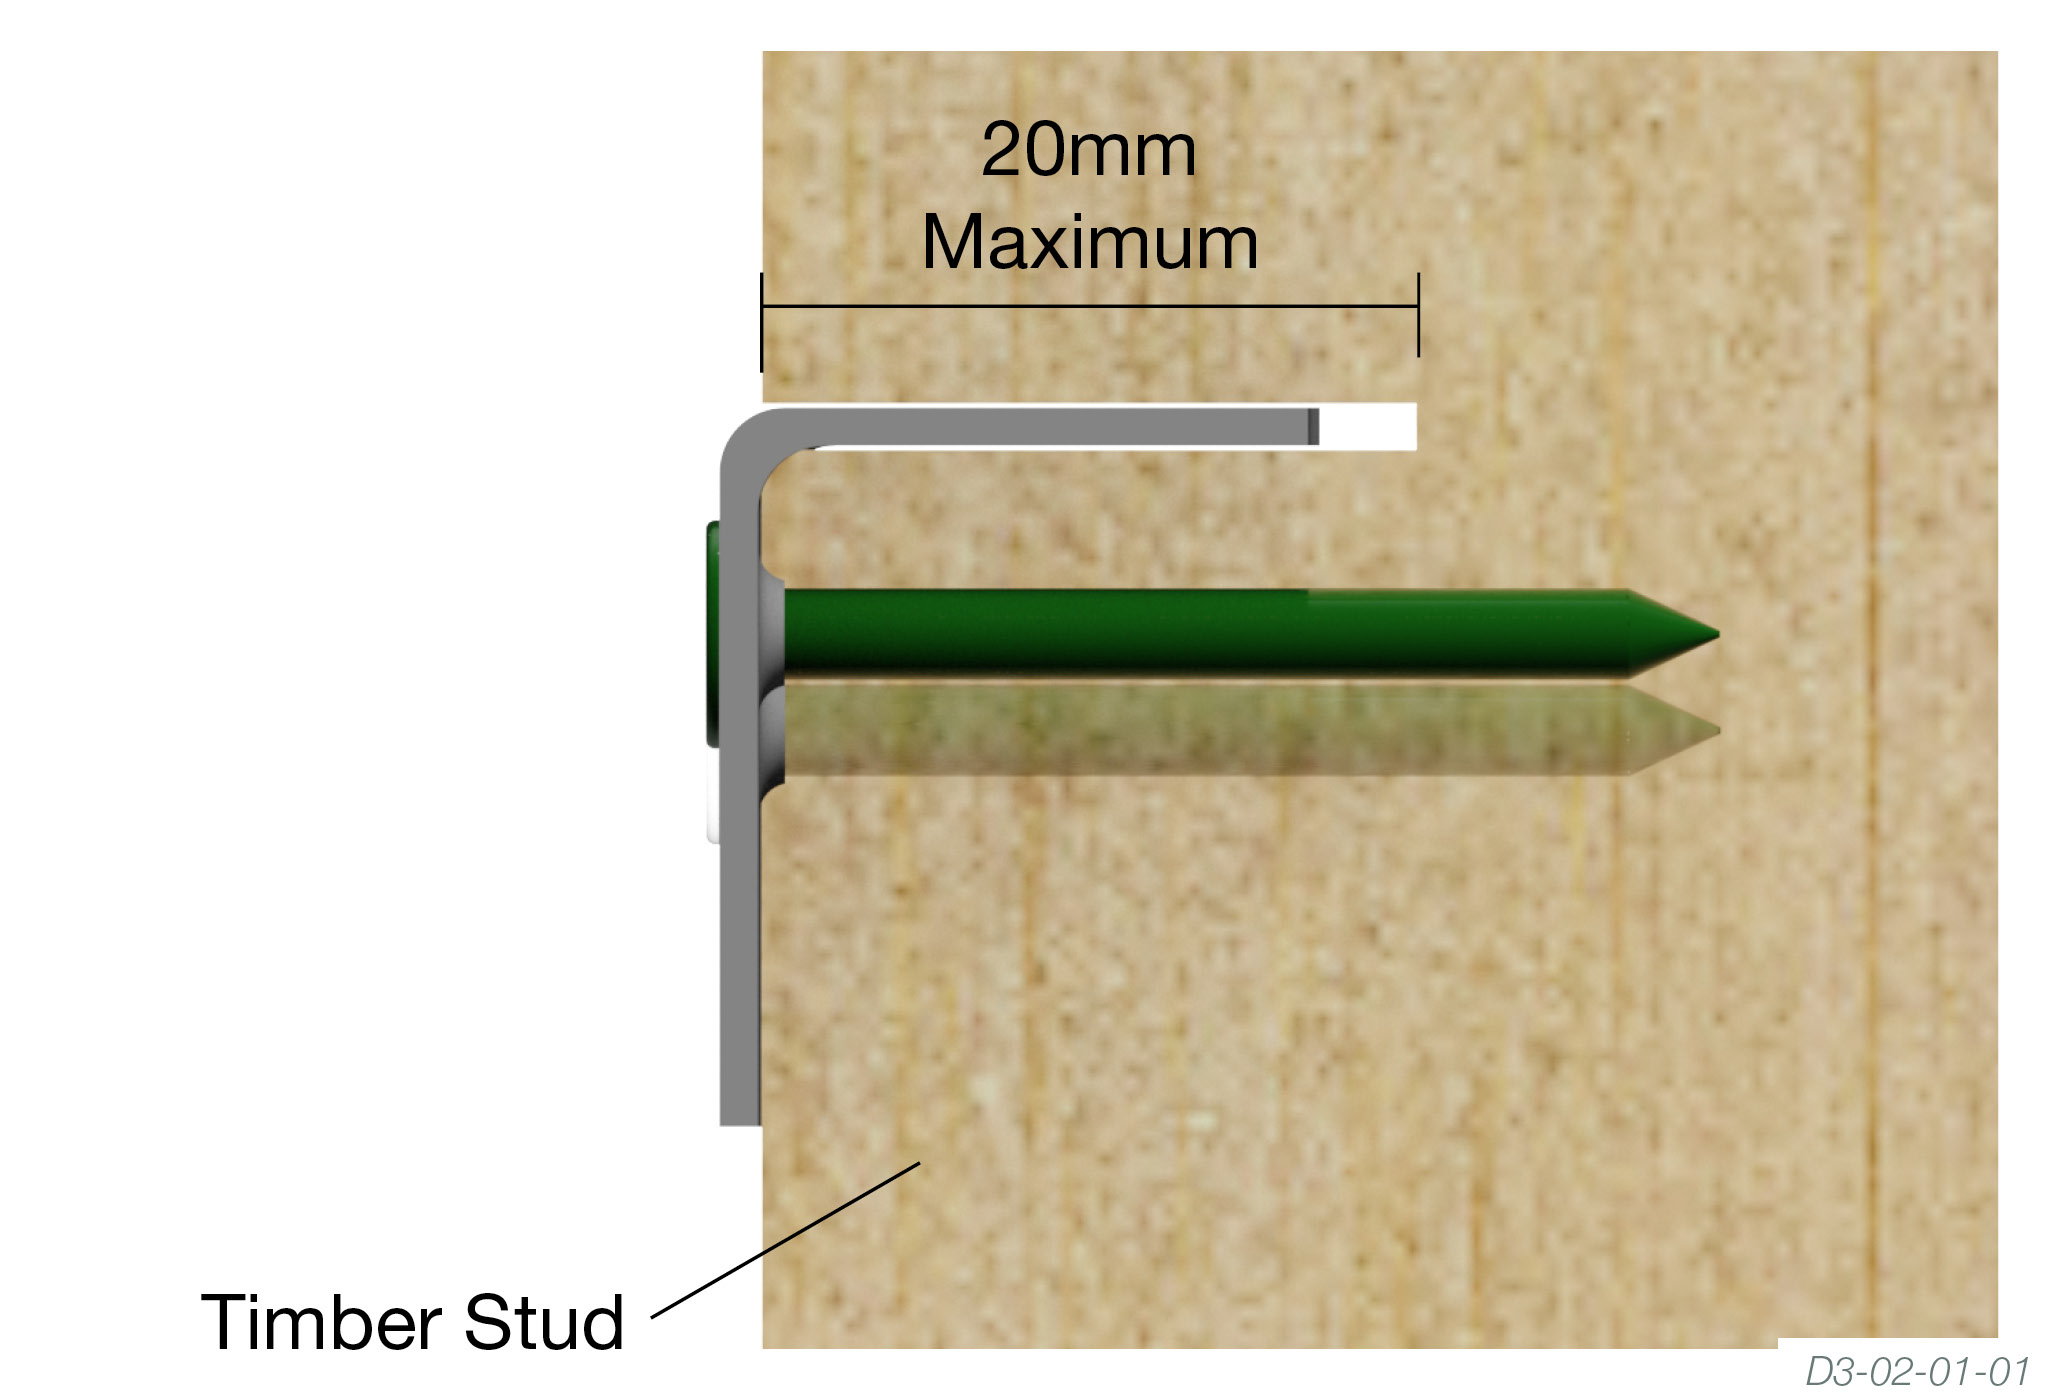 Figure D3-02-01-01
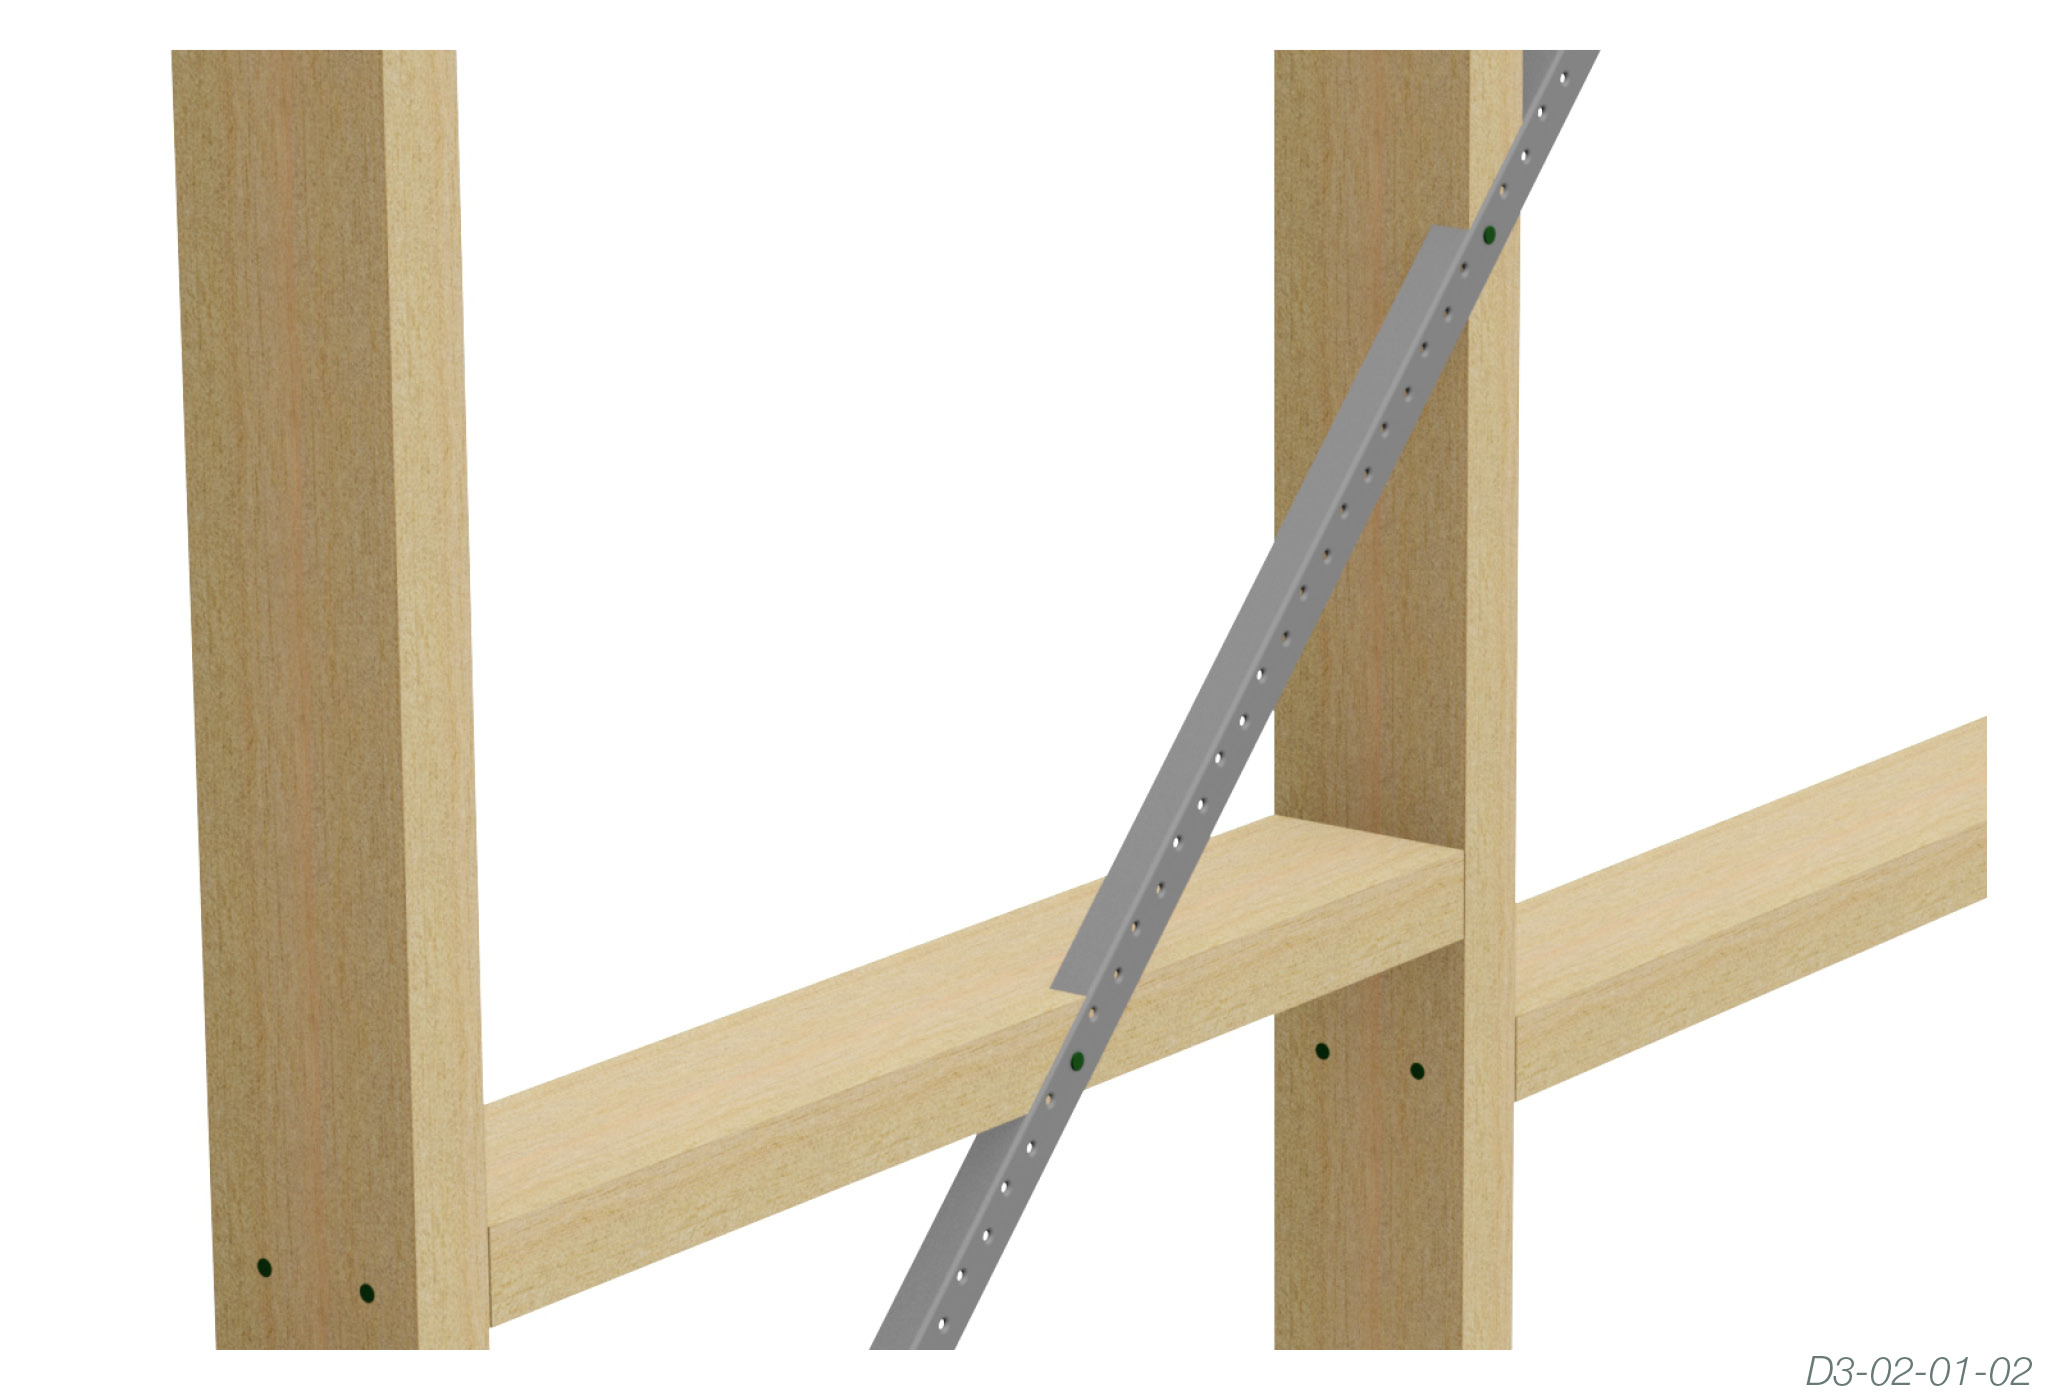 Figure D3-02-01-02
Ensure that Wall Bracing and nails are checked into stud making certain that they are flush with stud face.
1.5kN/m Bracing Capacity as per AS1684 Residential Timber-Framed Construction, Table 8.18(c)
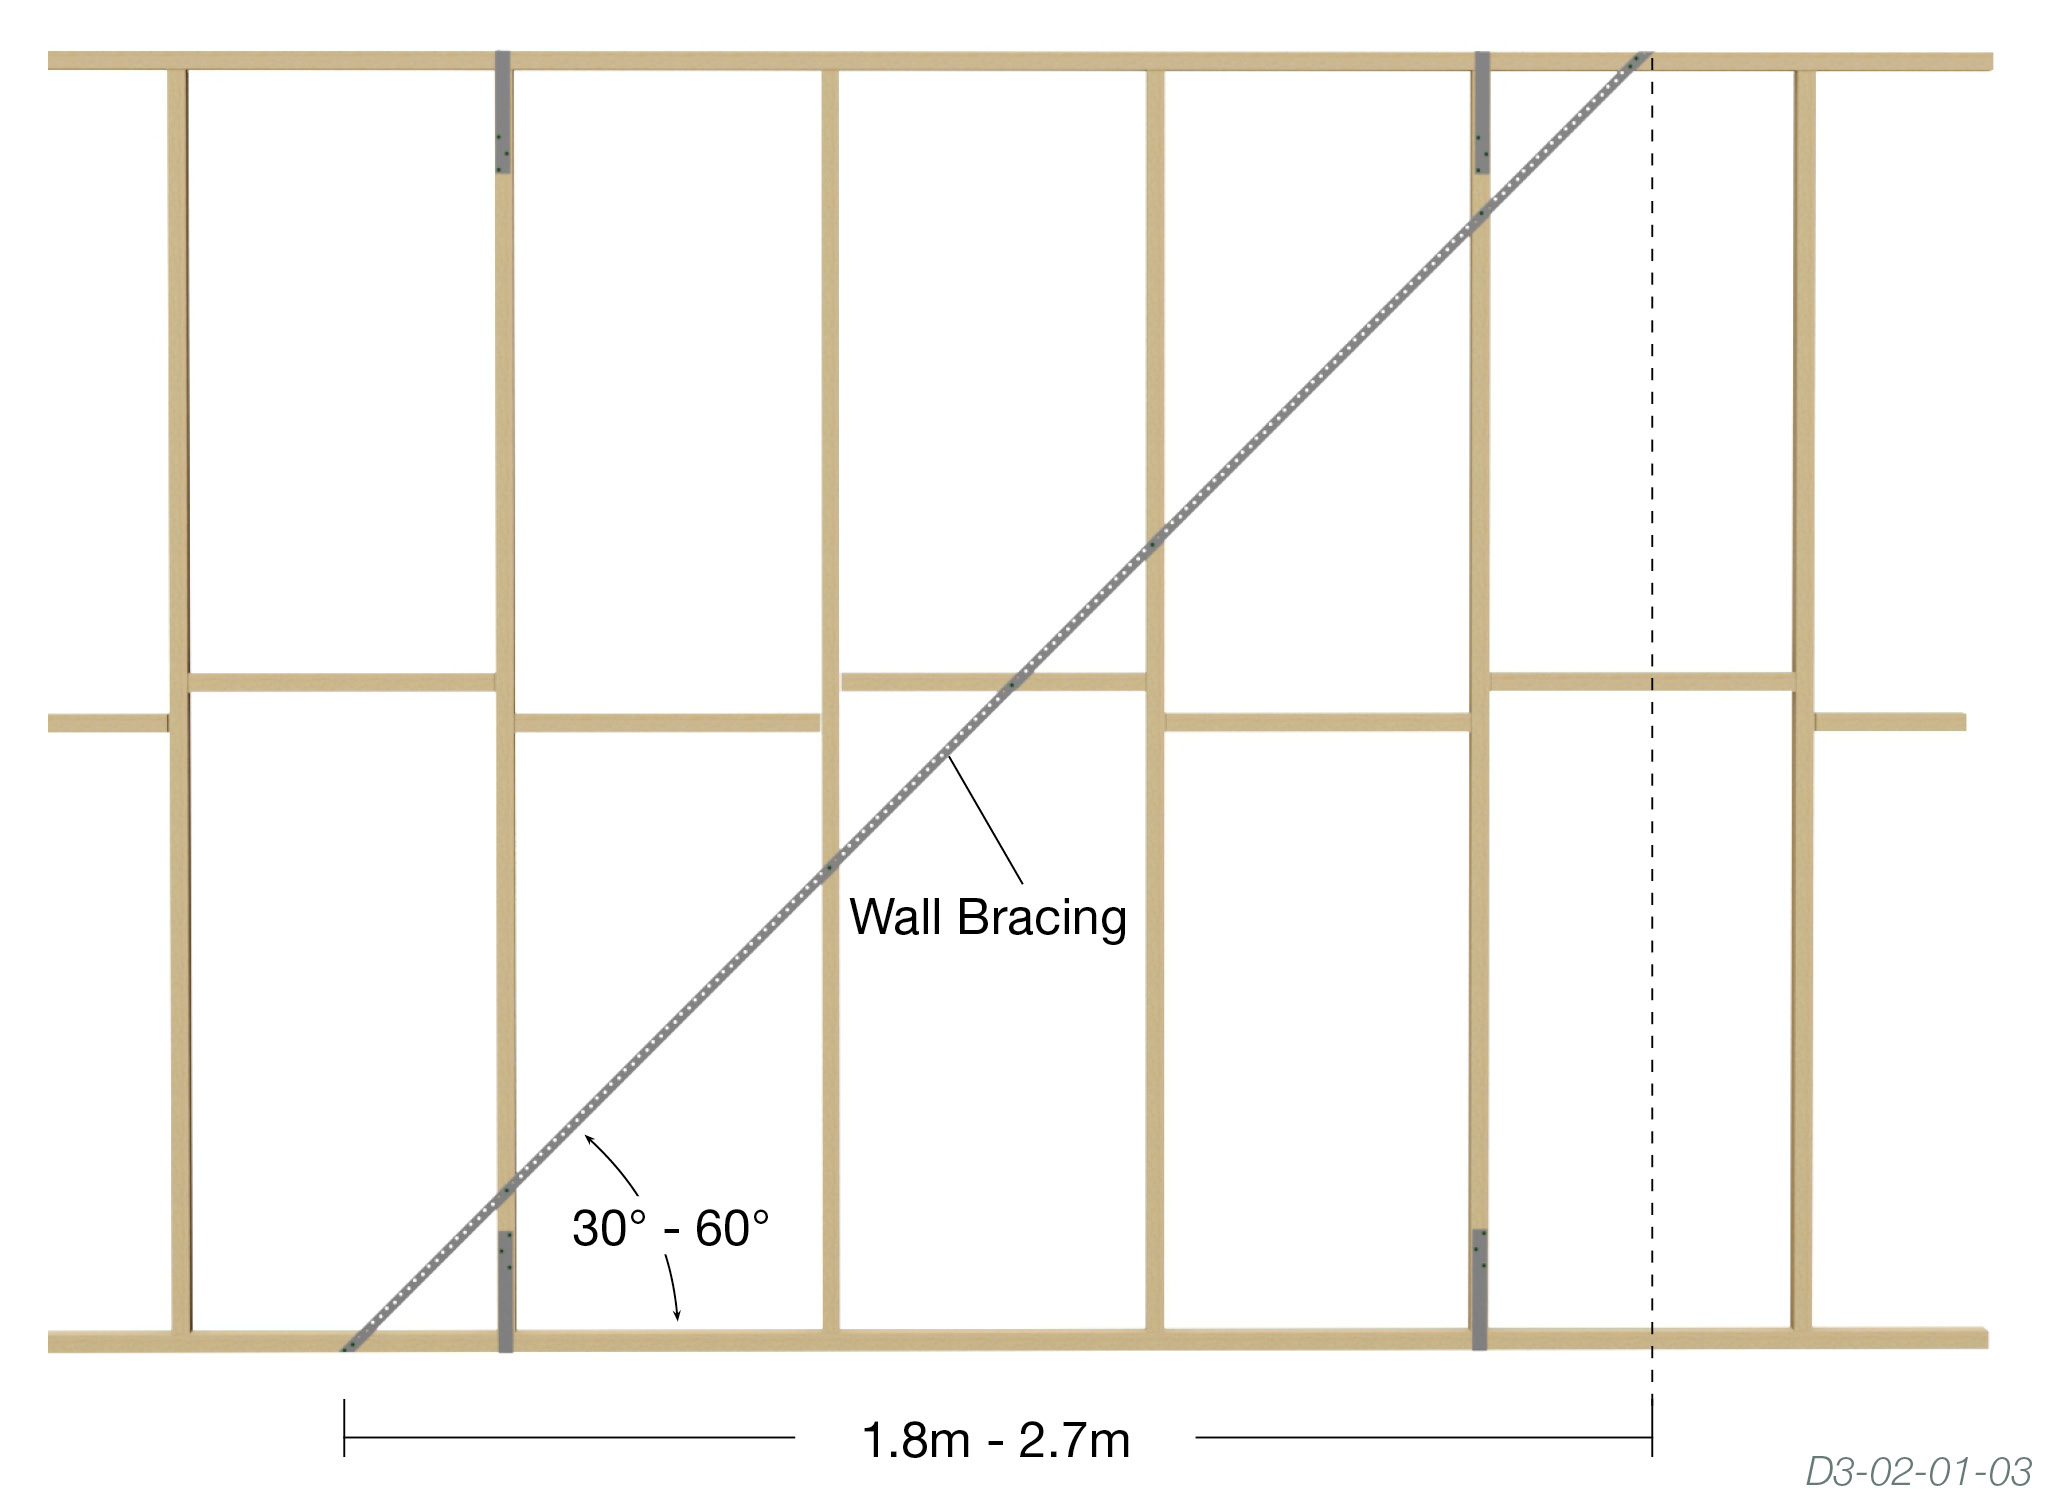 Figure D3-02-01-03
0.8kN/m Bracing Capacity as per AS1684 Residential Timber-Framed Construction, Table 8.18(a)
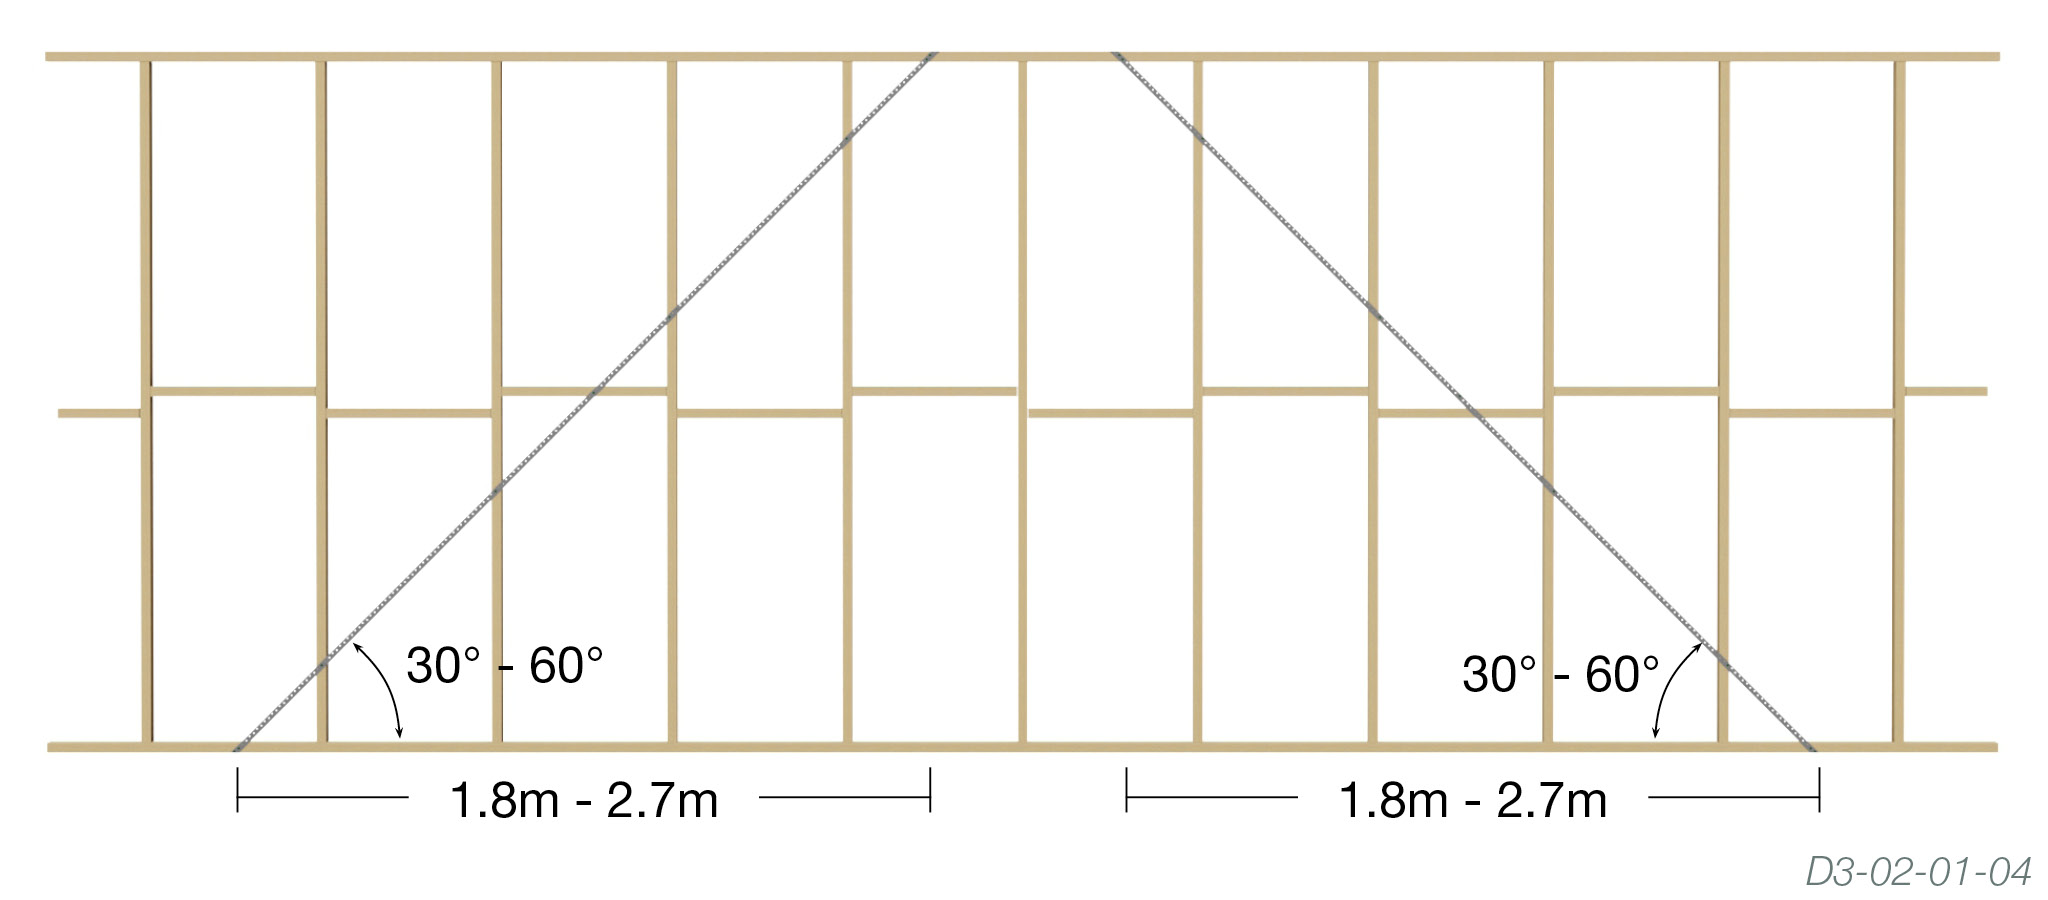 Figure D3-02-01-04