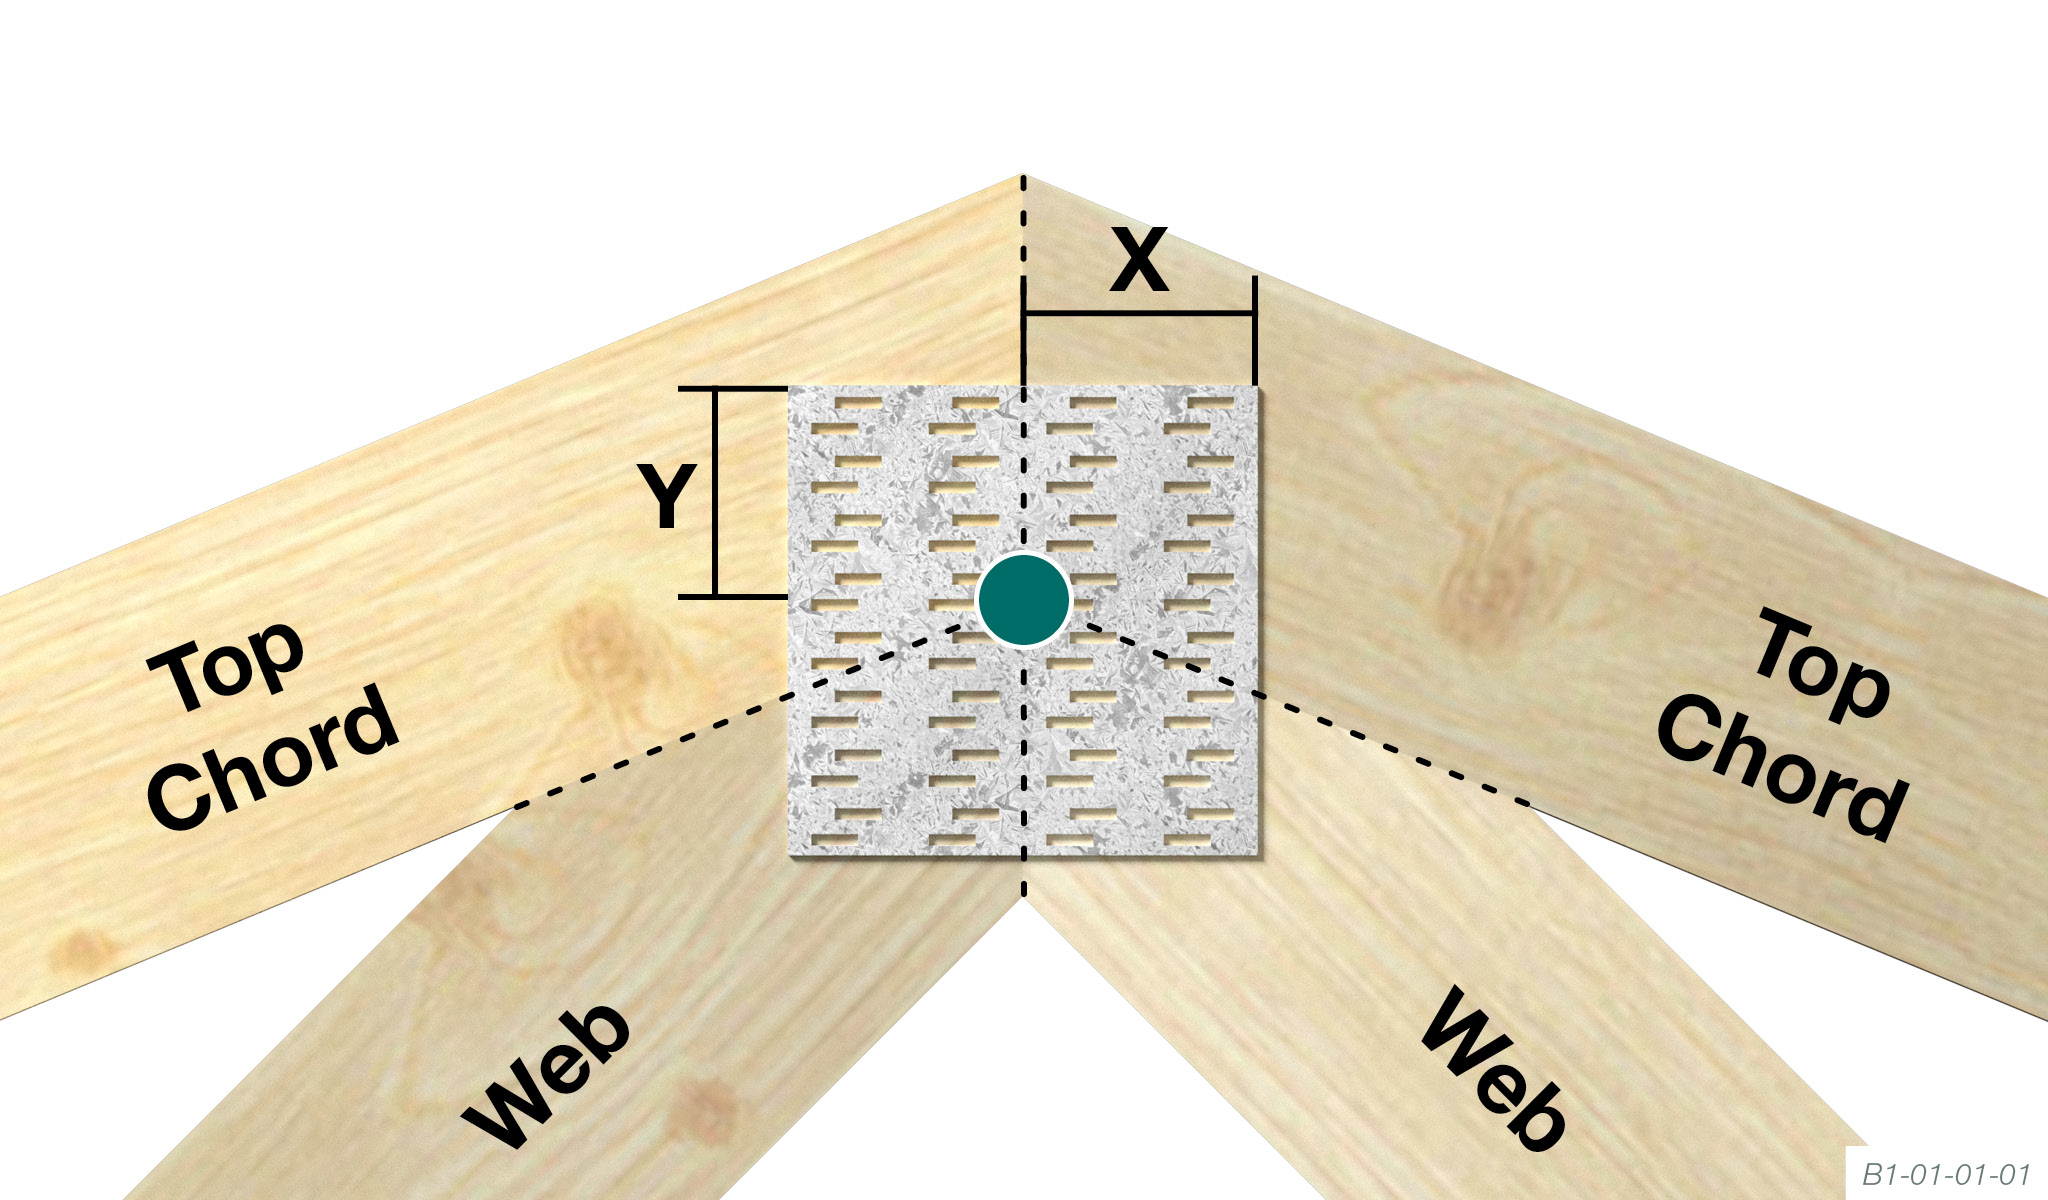
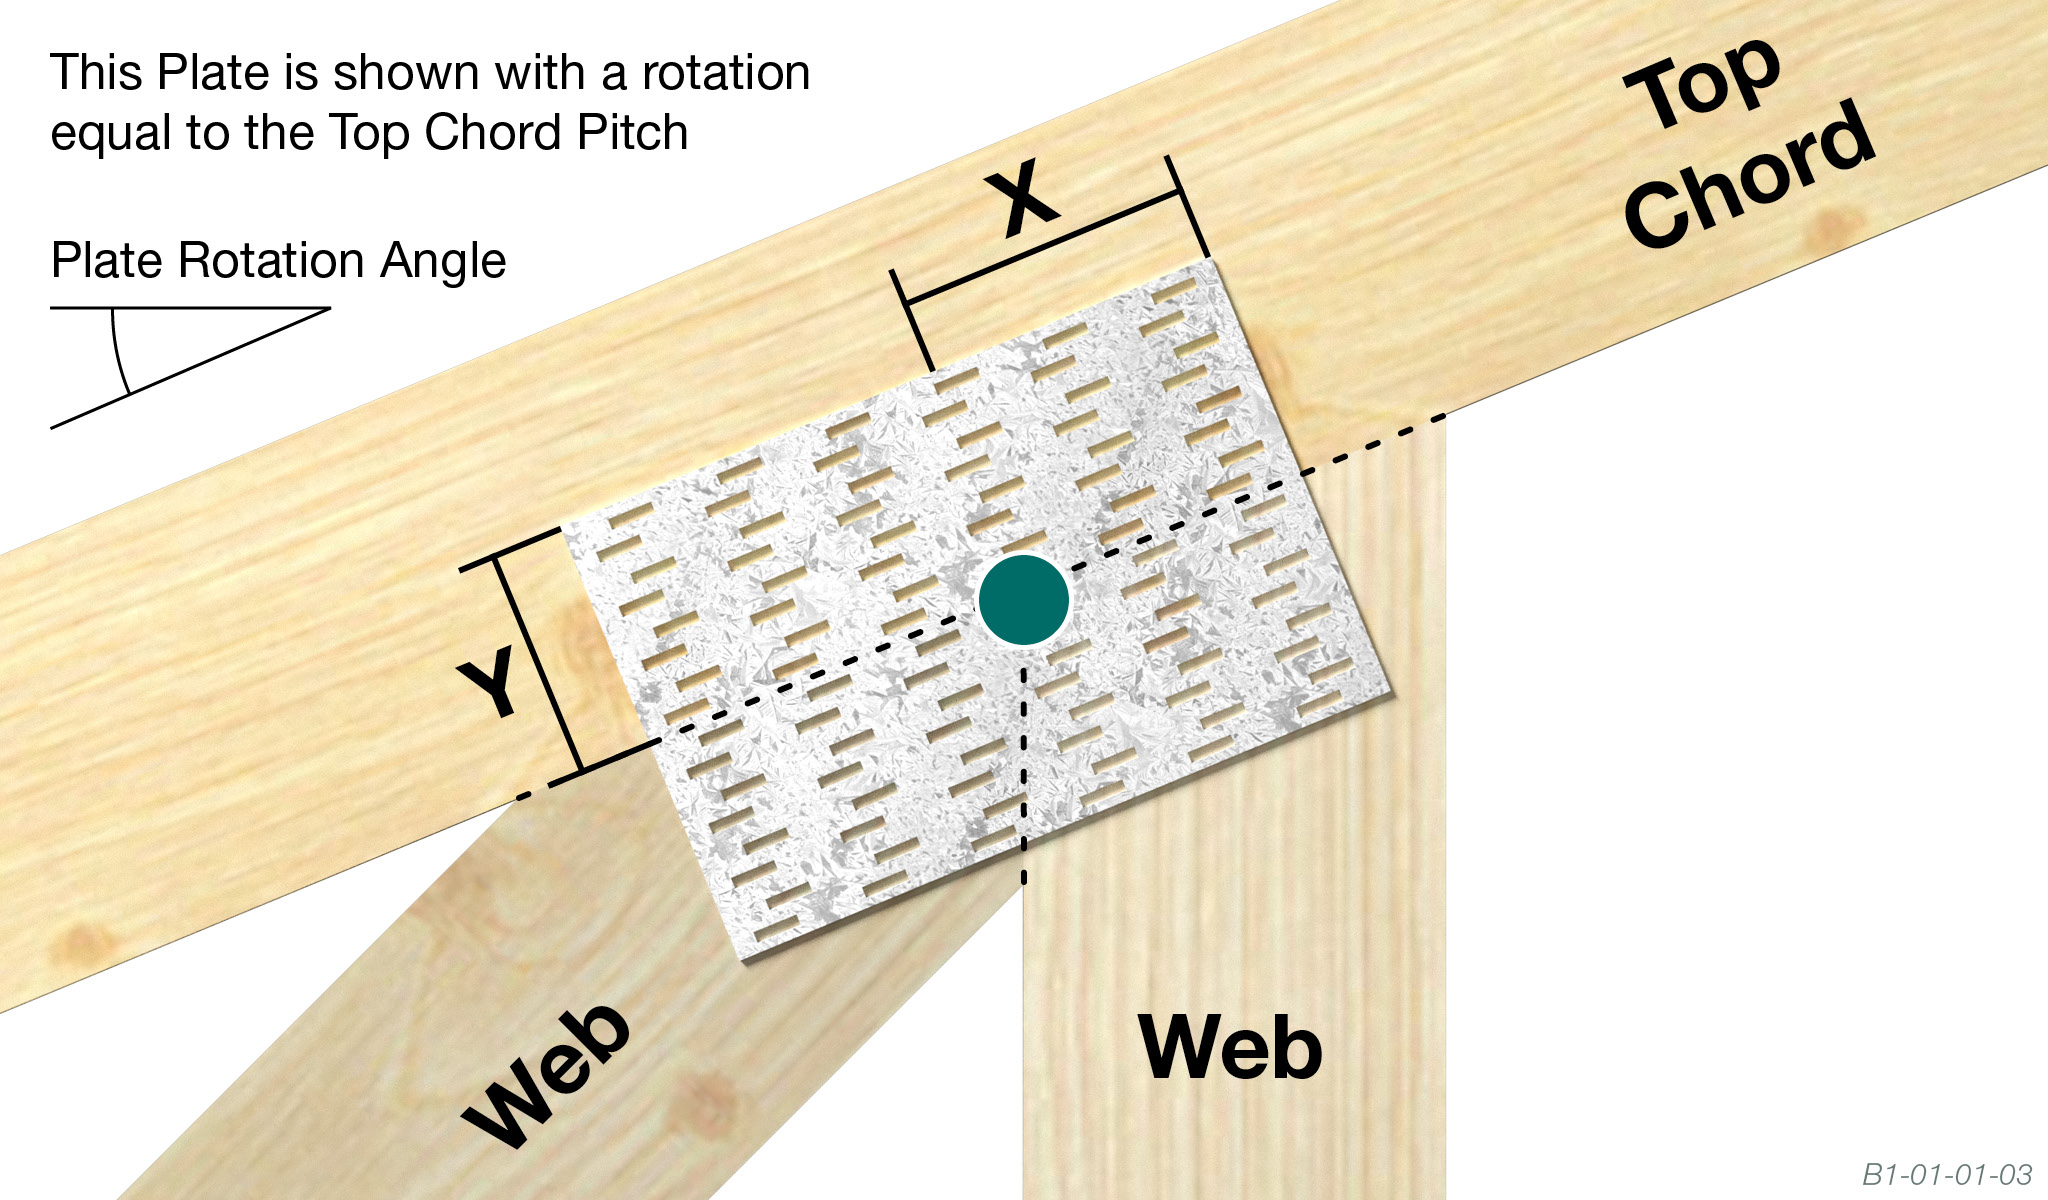
Top Chord Apex Joints
Standard Truss Apex
Half Truss Apex With Overhang
Half Truss Apex Without Overhang
Skylight Truss Apex
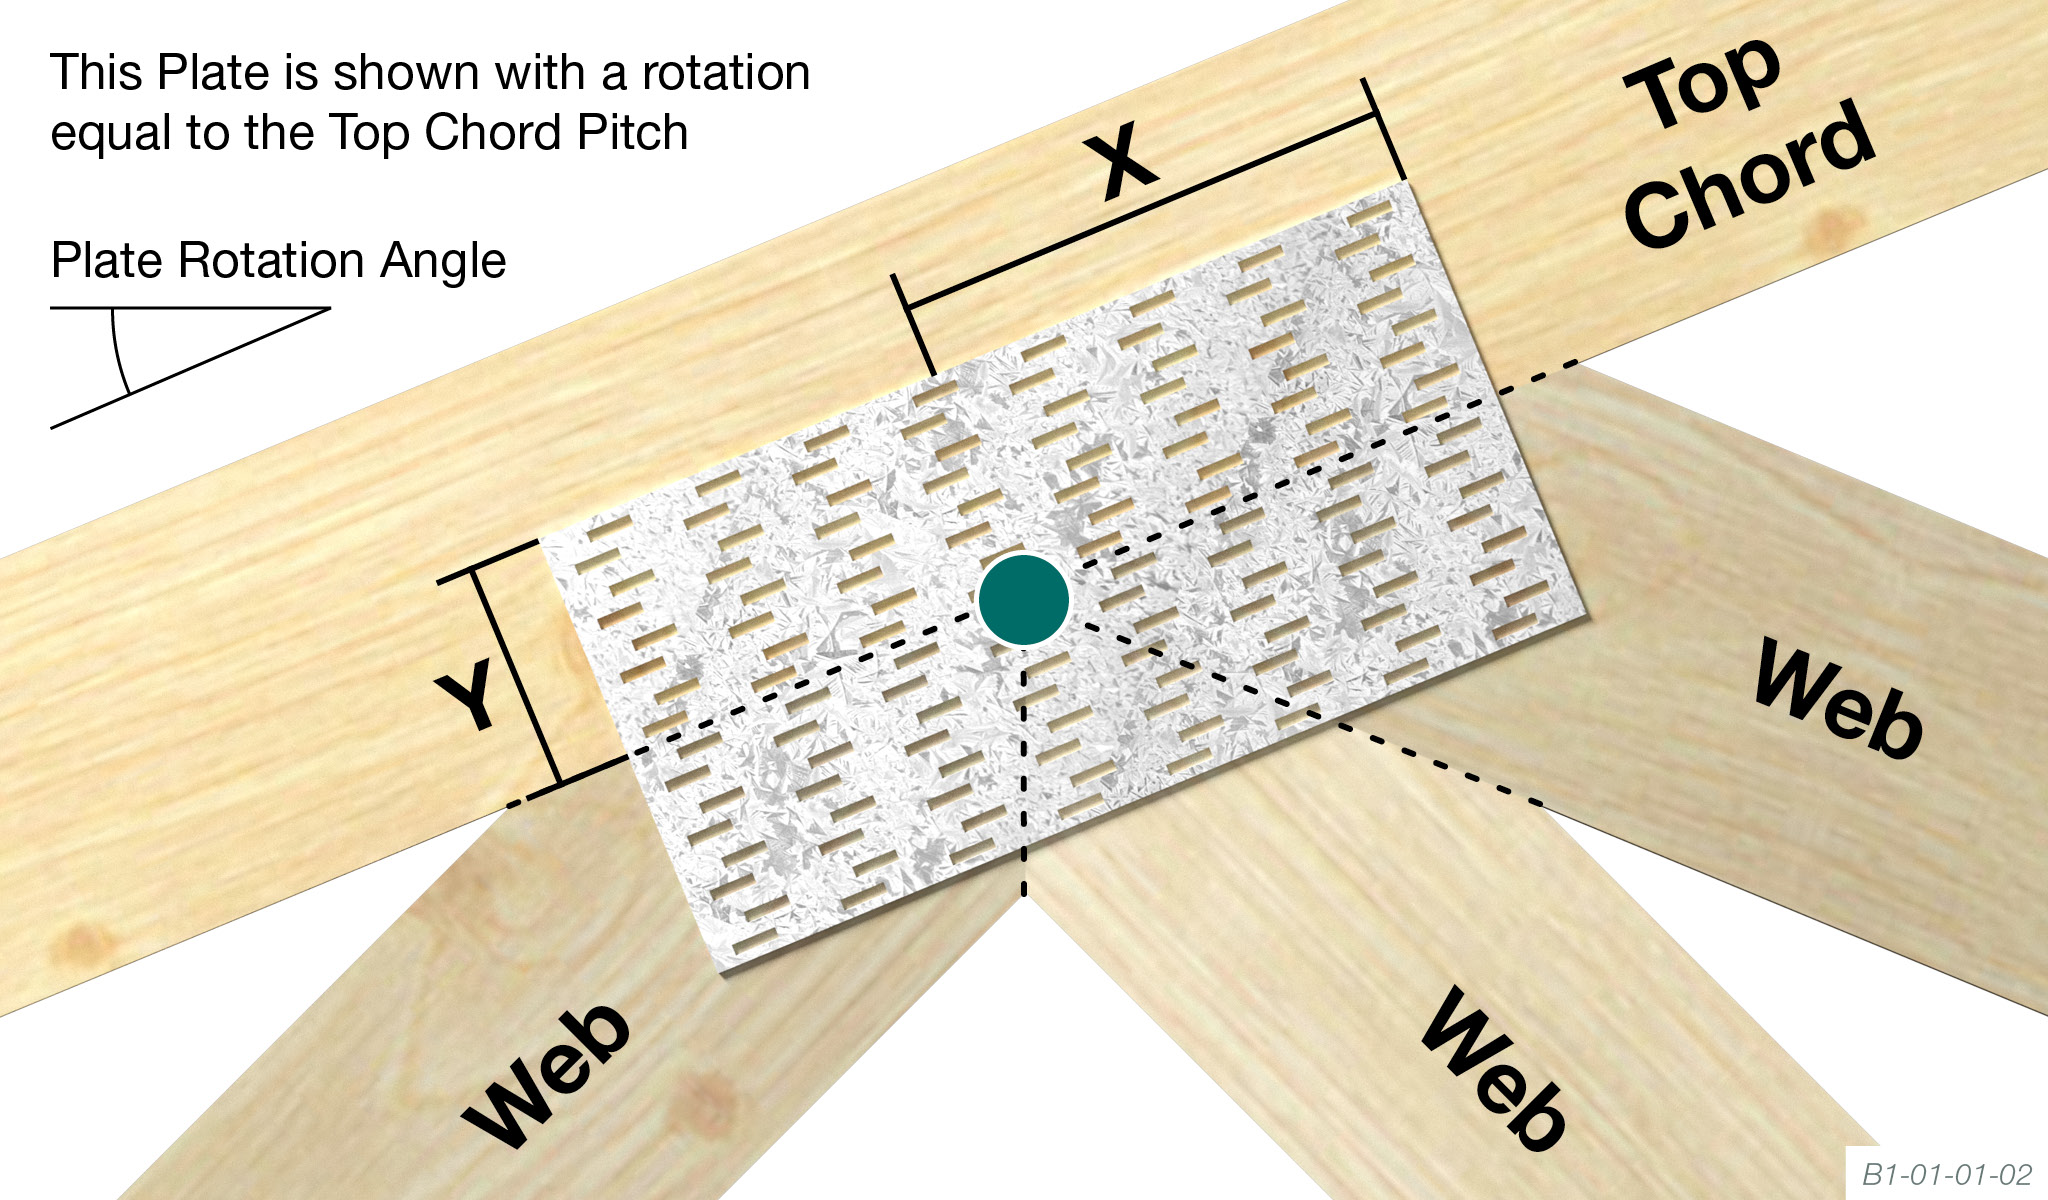
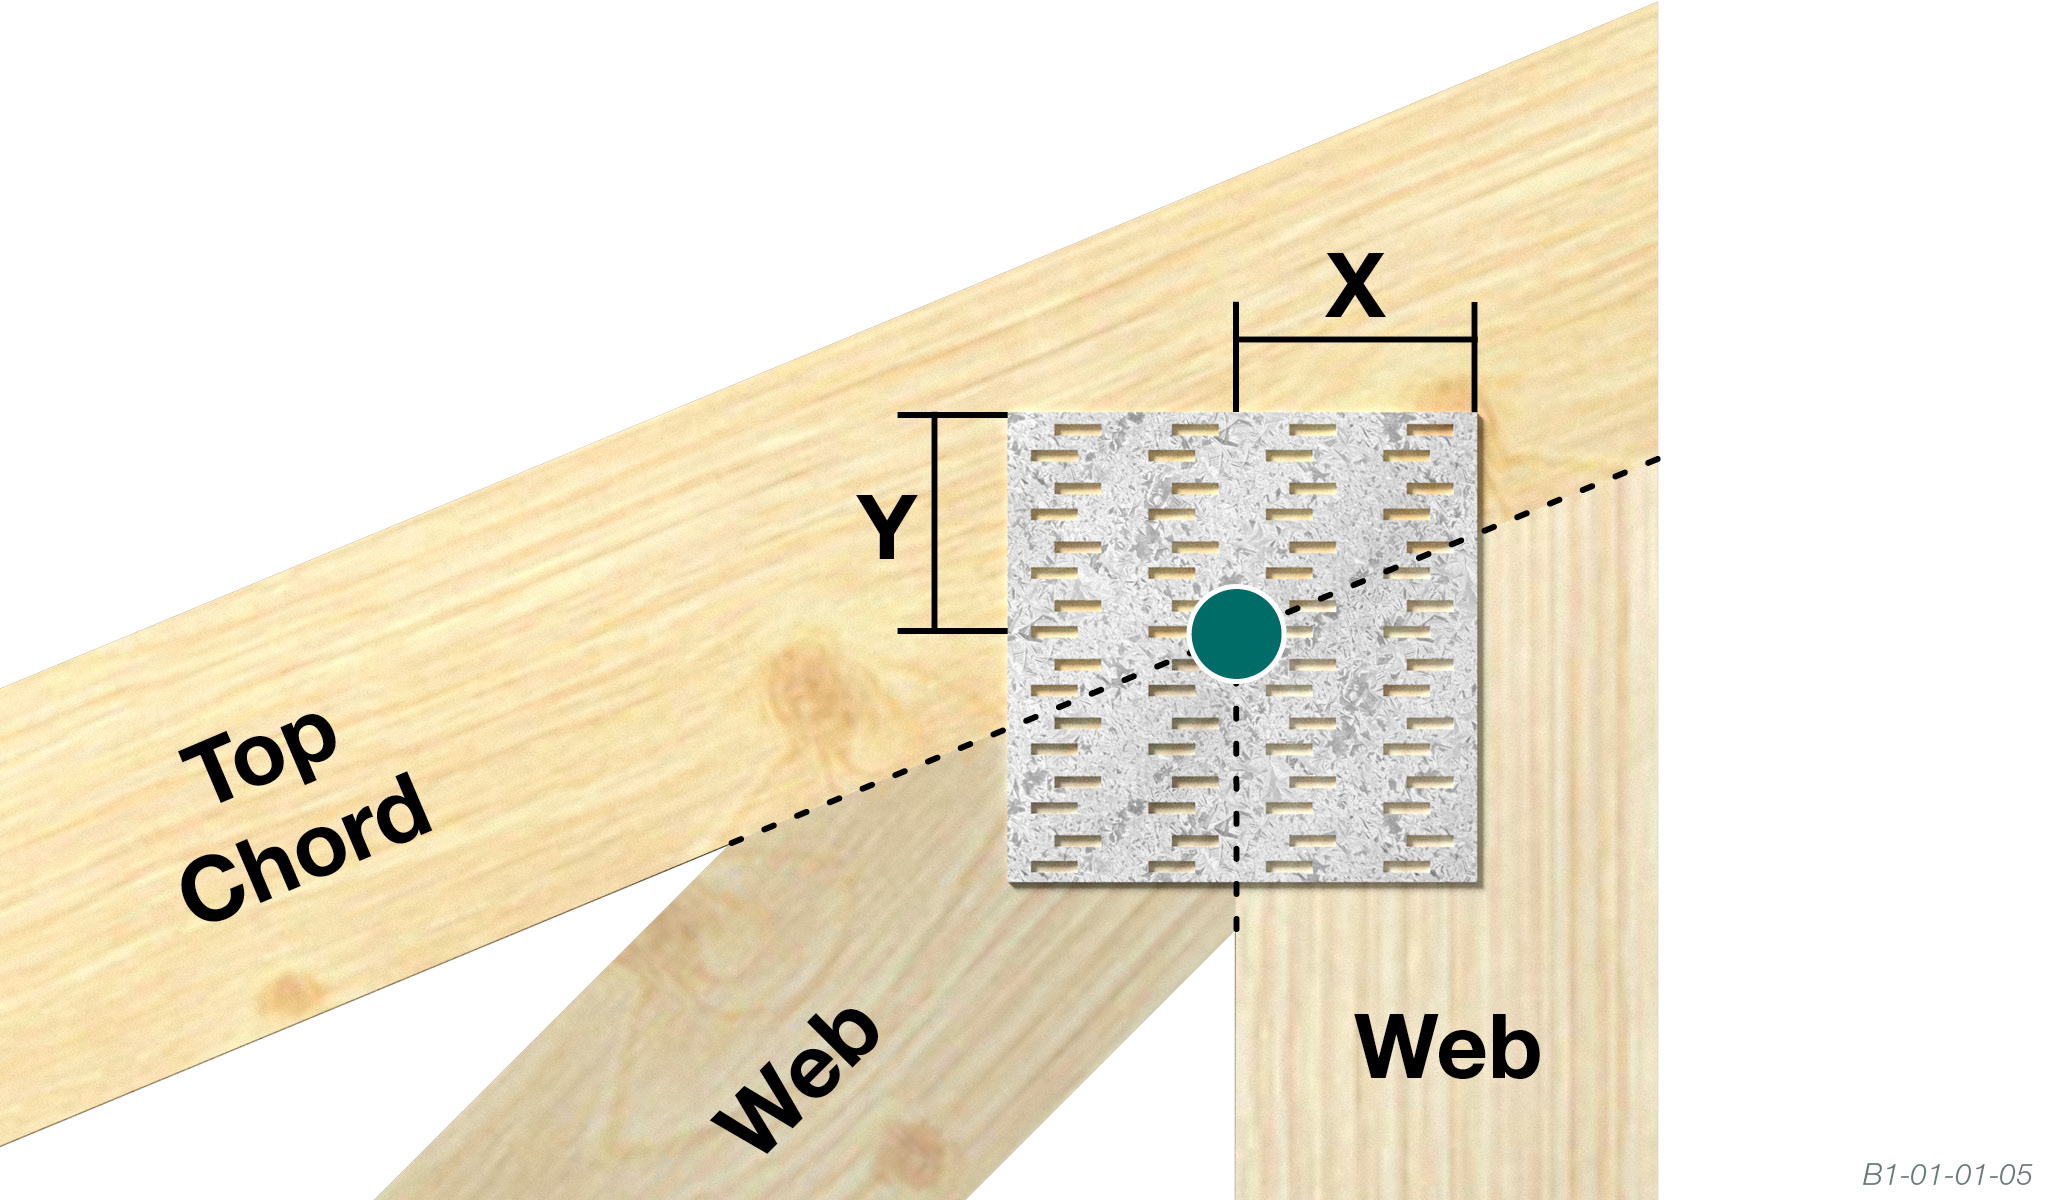
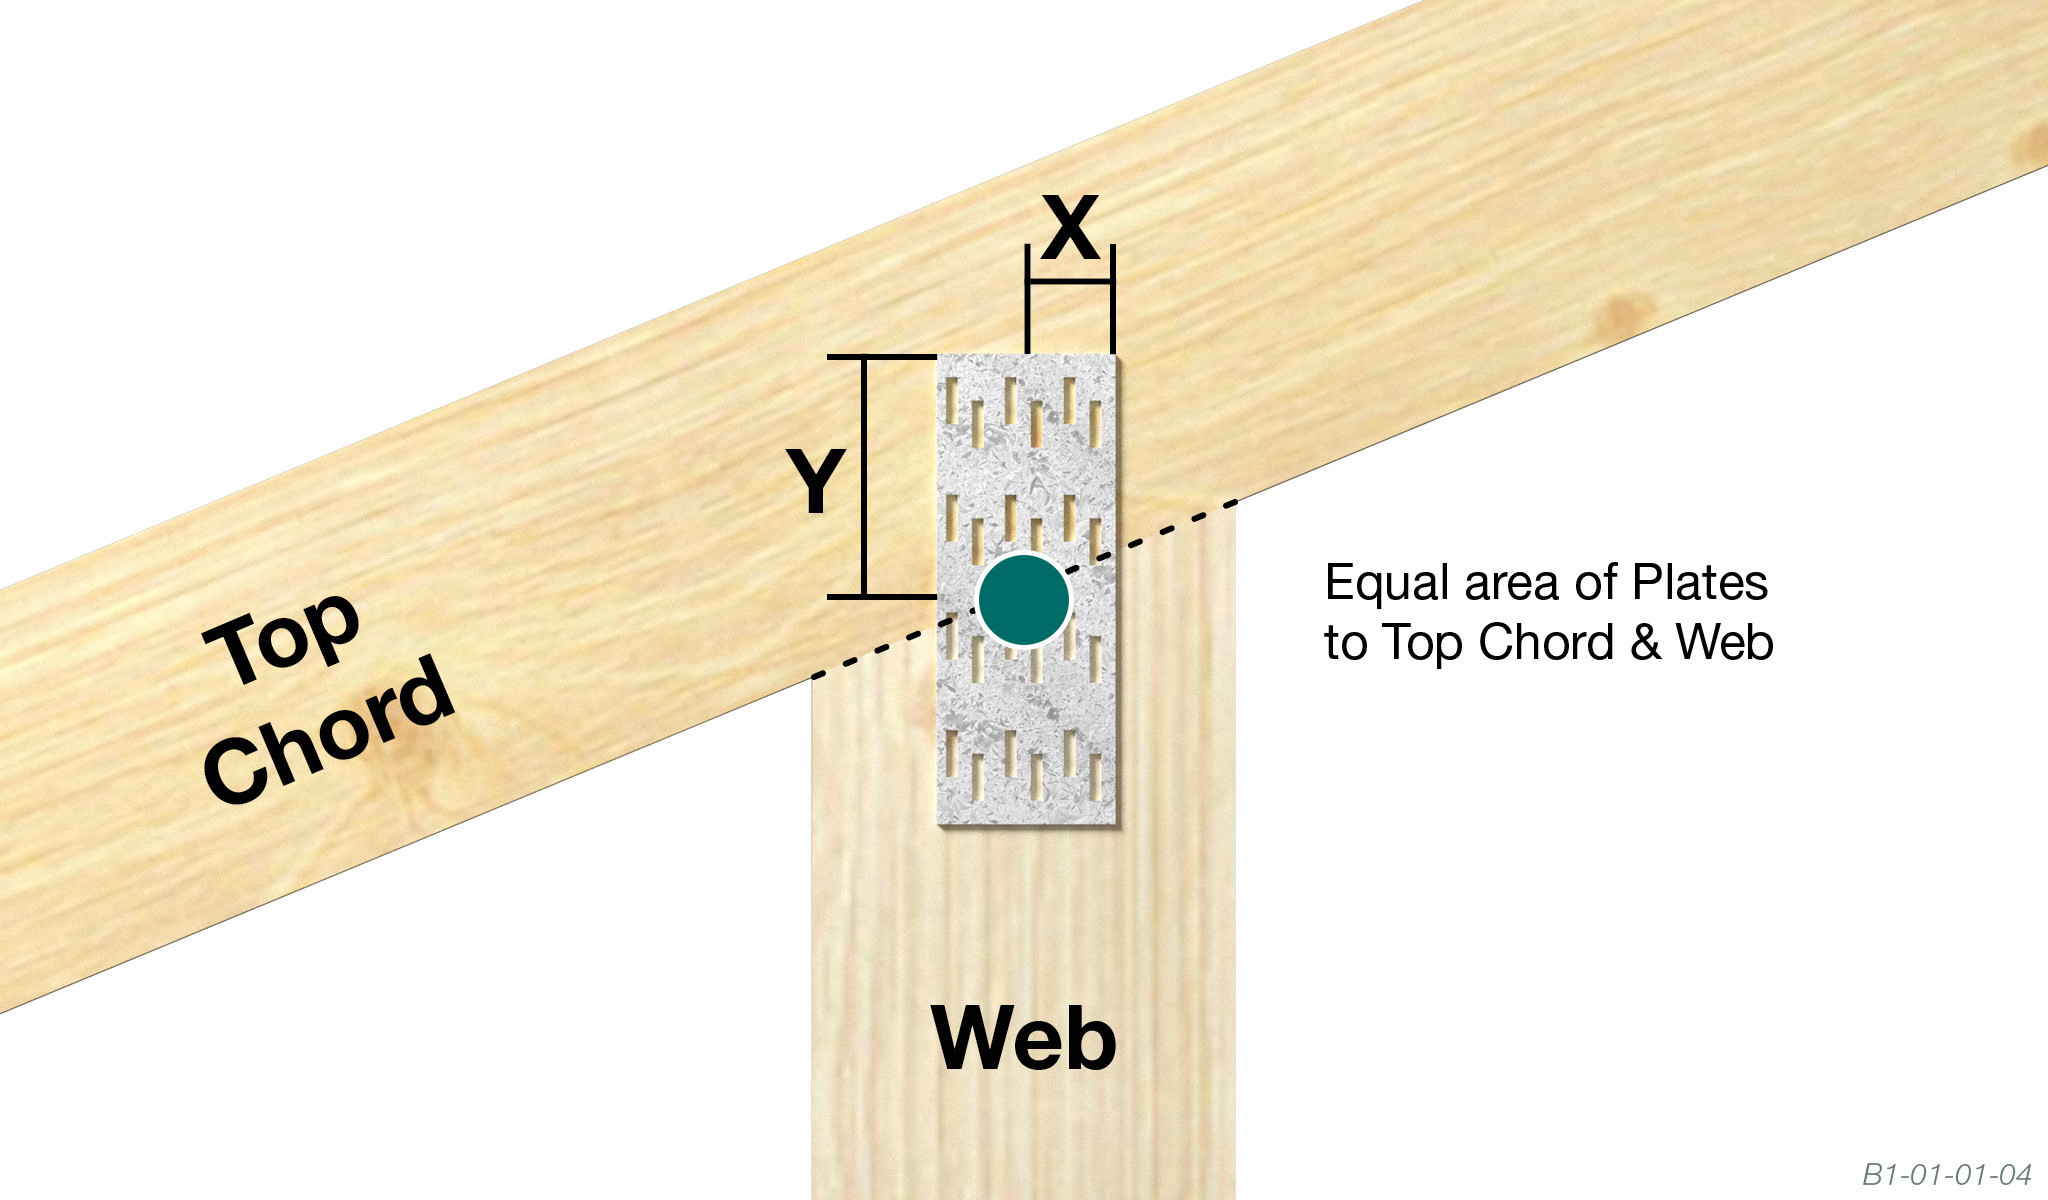
Vertical Web to Top Chord
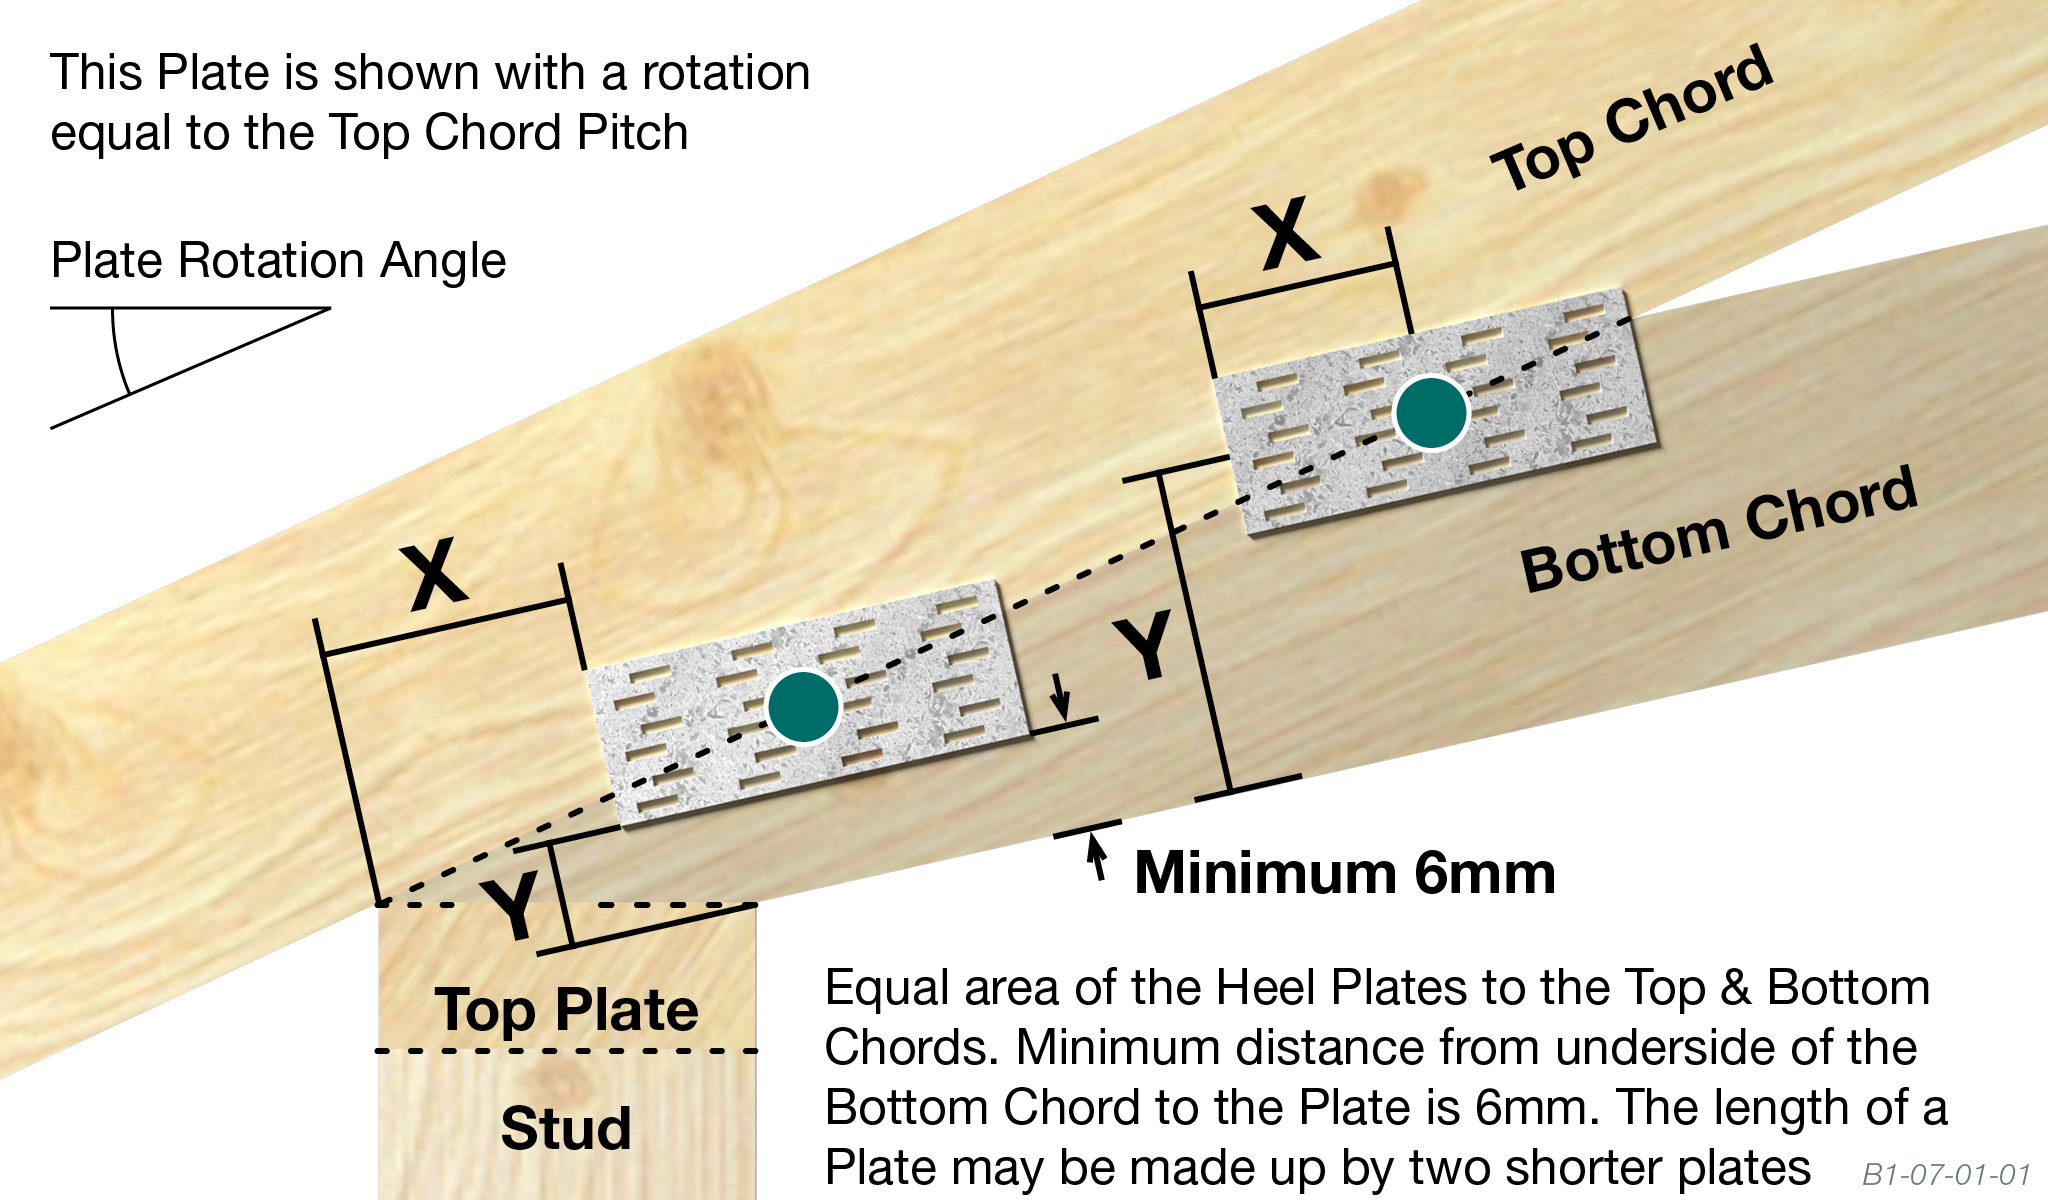
Standard Heel
Standard Heel
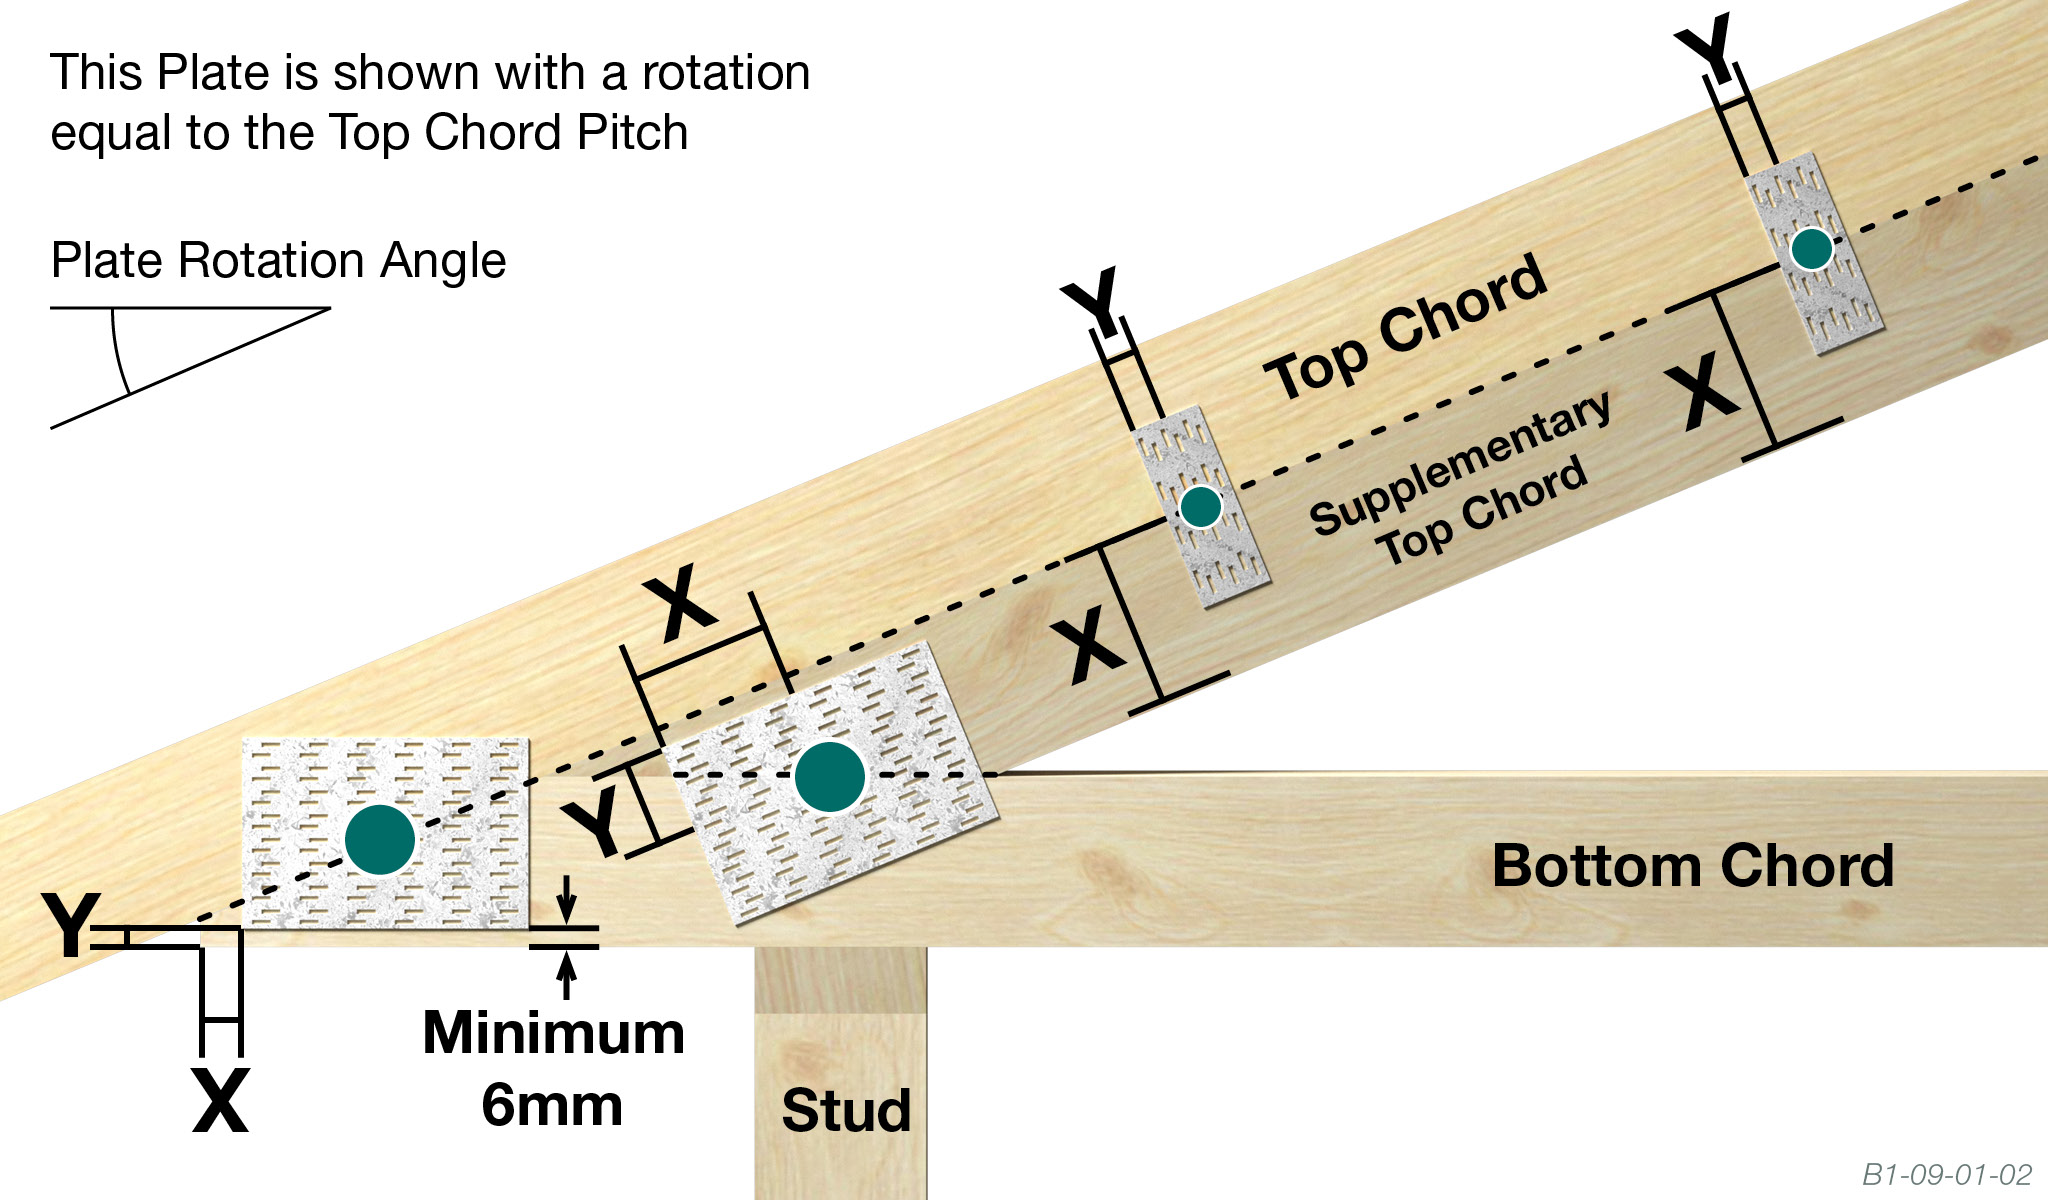
Cantilever with Supplementary Top Chord
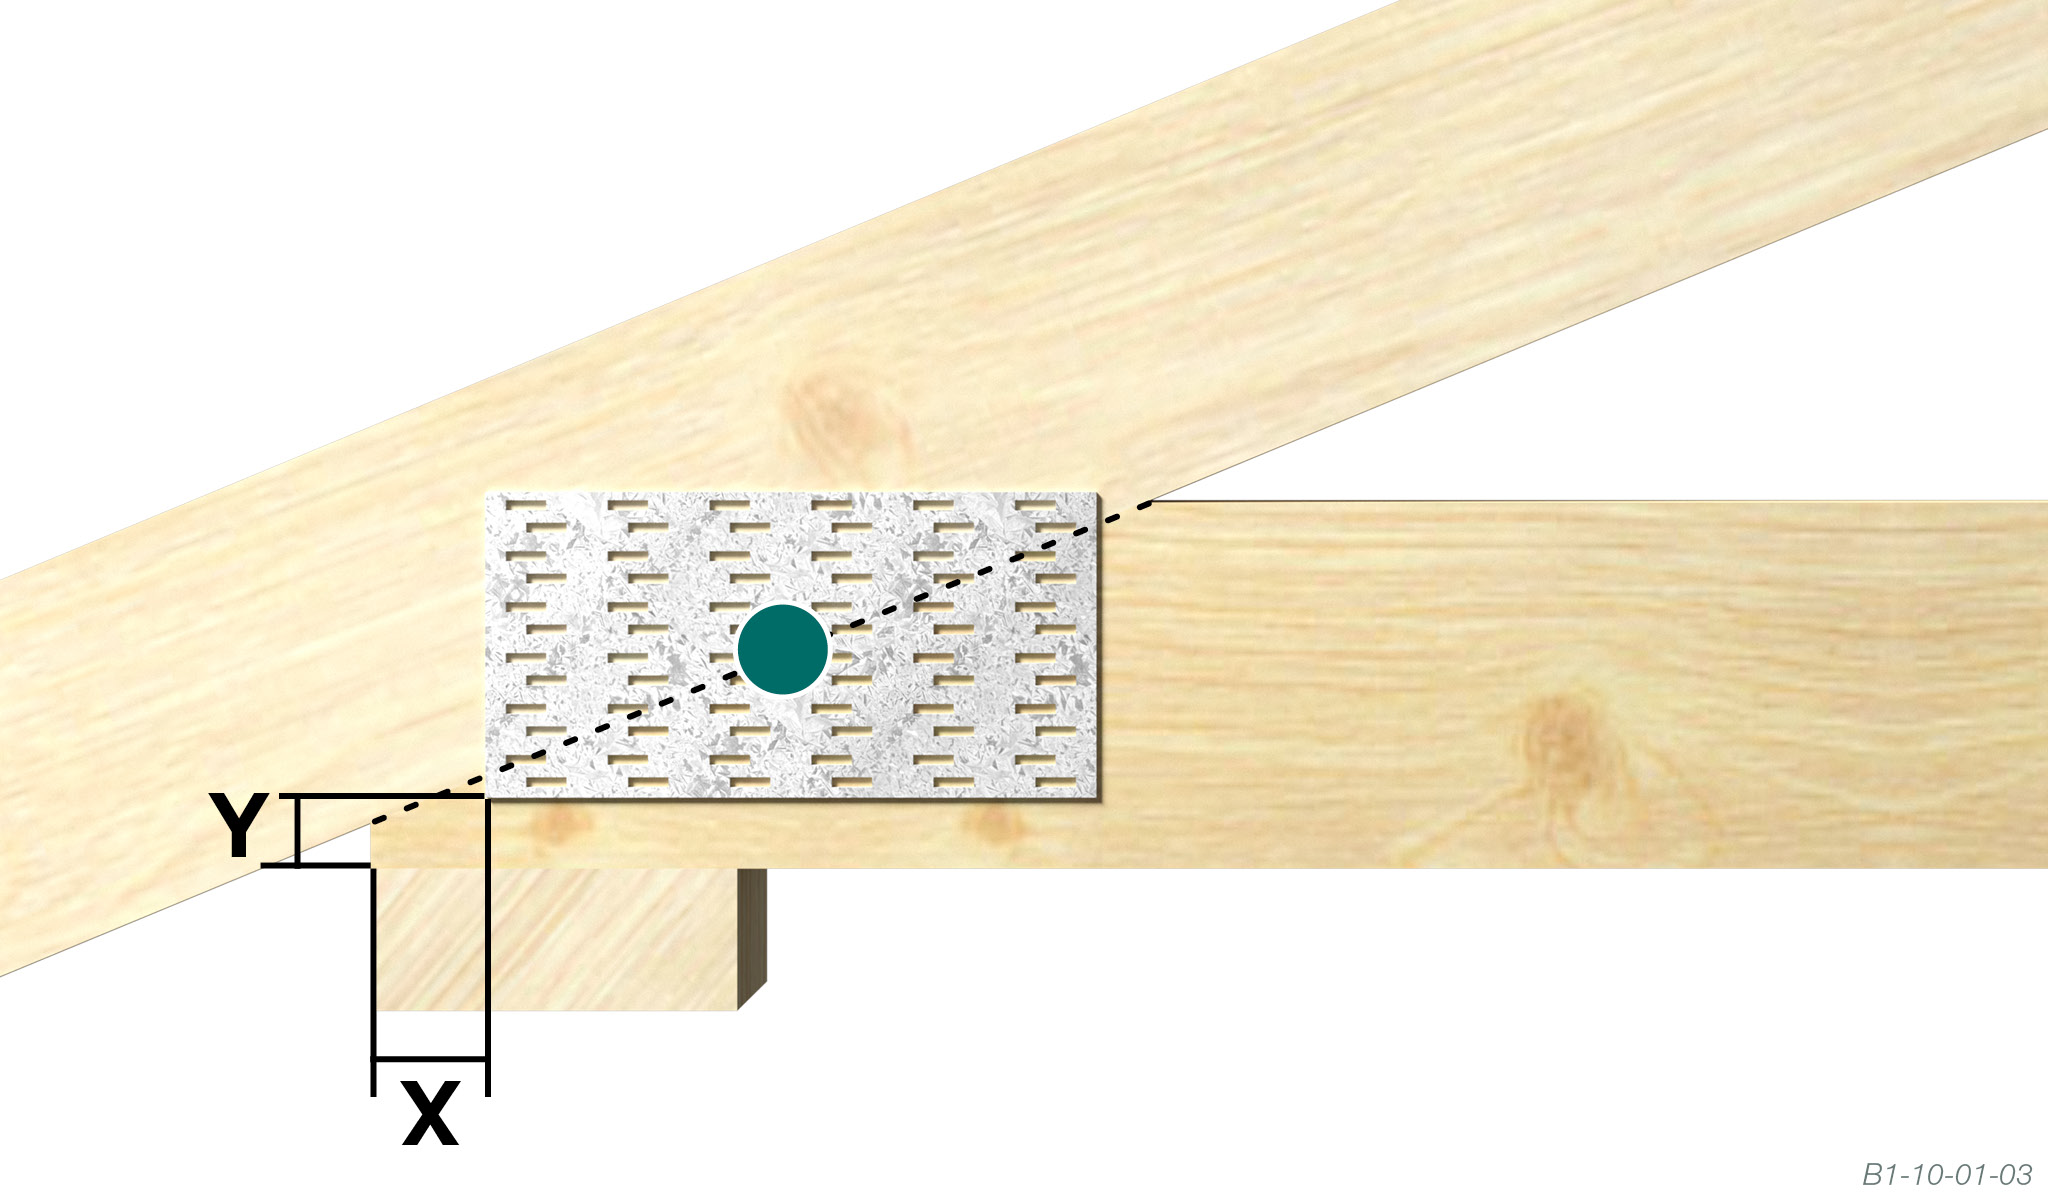
Nailplate Parallel to Top Chord
Scissor Heel
Scissor Heel
Cantilever with Chock Plating
Normal Plate coverage onto Bottom Chord applies
Plating Option A

Plating Option B
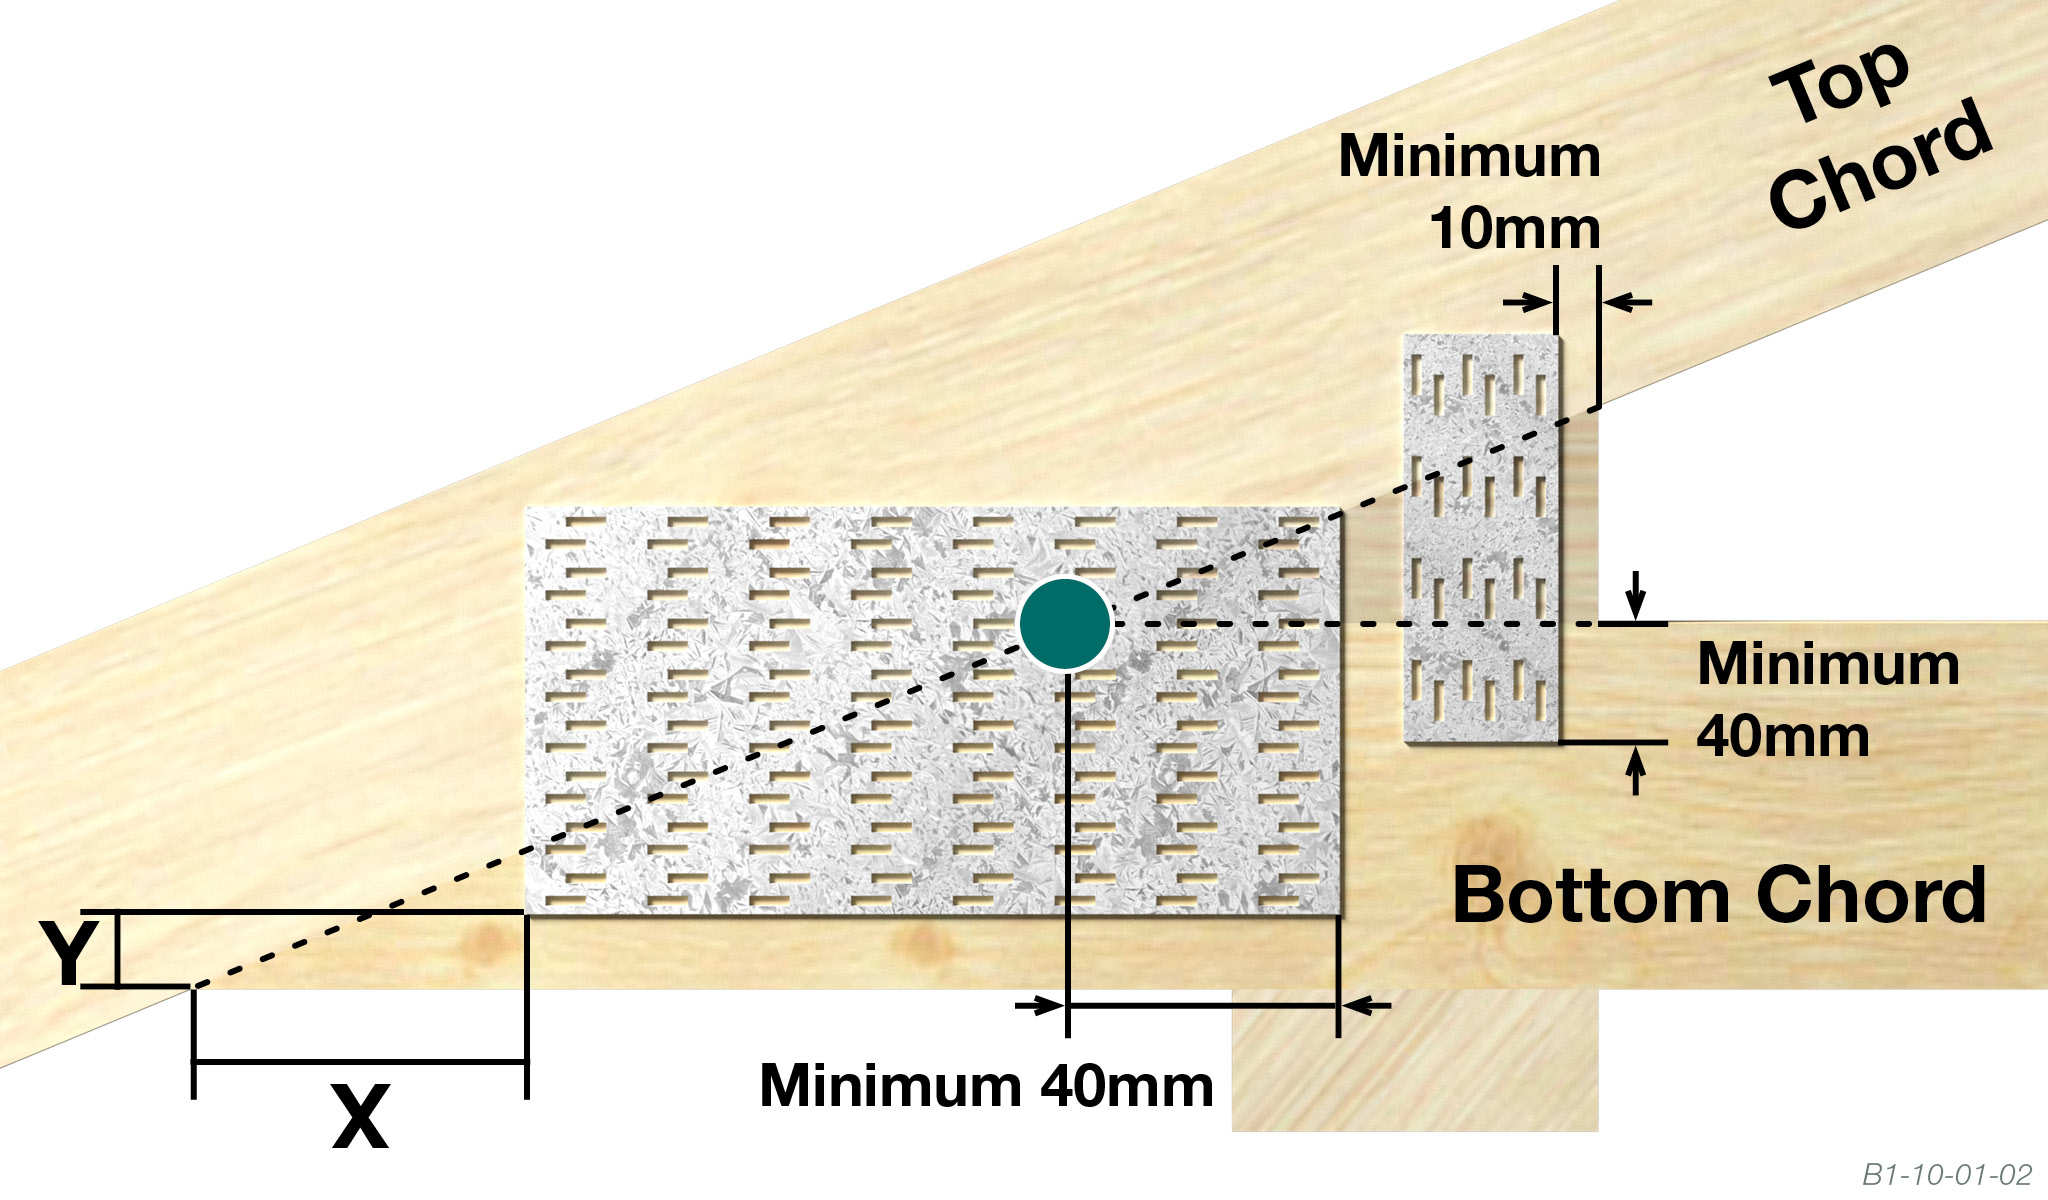
● Intersection reference point
NOTES: 1. X is referred to as the measurement along the length of the plate. Y is referred to as the measurement across the width of the plate.
2. When X or Y is = then the plate shall be positioned, for the relevant direction, centrally around the point indicated. (This does not apply to some heel & truncated hip joints. Refer to diagrams).